


First Birthday Party No-Sew High Chair Tutu Supplies DIY Steps
Before you roll up your sleeves and get to work, make sure to grab all the supplies you’ll need. This will help you be prepared, and you won’t have to run around the house looking for things last minute.
- Elastic band ½″ to 1″ thick and long enough to fit around the highchair
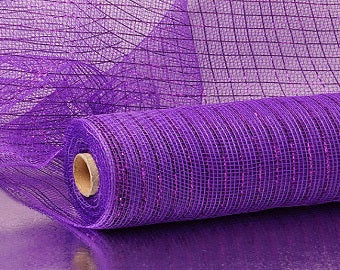
- Two rolls of tulle, about 4-6″ wide
- Sticky velcro squares to stick to the highchair on the outside of the tray (Two-sided tape will also work in a pinch if you can’t find any velcro)
- Decorative ribbon, which is optional for the outside of the tutu but will add some real flair
- Scissors to cut everything down to size (Think about using ones that create decorative edging, to make your tutu look even more special!)
First Birthday Party High Chair Tutu DIY Steps:
DIY’s are such a fun way to stay busy, and the pleasure is even greater when you do it for your kids. If this is your first time making a tutu, remember to be organized and prepare beforehand all the things that I listed above.
It will probably take you less than two hours to complete this project, meaning it’s a great weekend activity. And without further ado, I present to you the simple tutorial on how to make a high chair tutu step by step:
- Take a piece of tulle and fold it in half. You’ll need to make sure the tulle is the final length that you want when it’s folded. If you are in doubt, always cut a longer piece than you need. It’s much easier to cut off any extra later than to have to start all over again!
- Hold the fold of the tulle above the elastic with the elastic over the tulle.
- Loop the longer piece of tulle over the elastic and through the fold of the tulle.
- Pull the longer piece of tulle tightly through the loop.
- The loop should be pulled tight to the elastic and what is seen around the outside of the highchair tray once it is attached.
- Starting at one end, place the sticky velcro squares around the outside of the highchair and match them up with the inside of the tutu. It should fit flush against the highchair when you are finished.
- The tutu will need to be tied in the back once the birthday girl is placed in the seat, so that first birthday party pictures can be taken.
- Think outside of the box and get creative with bows, stick-on jewels, or any other fun pieces that strike your fancy.
Seriously, that’s it! Even if this is your first time getting crafty, learning how to make a no-sew highchair tutu couldn’t be easier, so it is a perfect first-time project. If your daughter is like mine, she will want to wear it around the house afterward for sure, but once she outgrows it, wouldn’t that make the perfect addition to your memory box?
Other Fun DIY Tutu Ideas
I created the tutu by using the same steps as my Infant Tutu. I routinely use the tutu tutorial to create tutus for Halloween costumes or just as tutus for dance. I think tutus are just part of the territory when having a daughter, and the only limit to what you can do with them is your imagination.
Highchair vs Skirt Tutu
The biggest difference between the DIY high chair tutu and the skirt tutu is that you need to keep the elastic long enough to wrap around the high chair. I was able to simply tie it behind the chair that the highchair sits on. Depending upon your highchair, you might need to cut your elastic longer, and unless you can get your daughter into the highchair without removing the tray, you won’t be able to tie it until she is in the highchair. The tutu only took me about an hour and a half to make, and the pictures were well worth the effort.
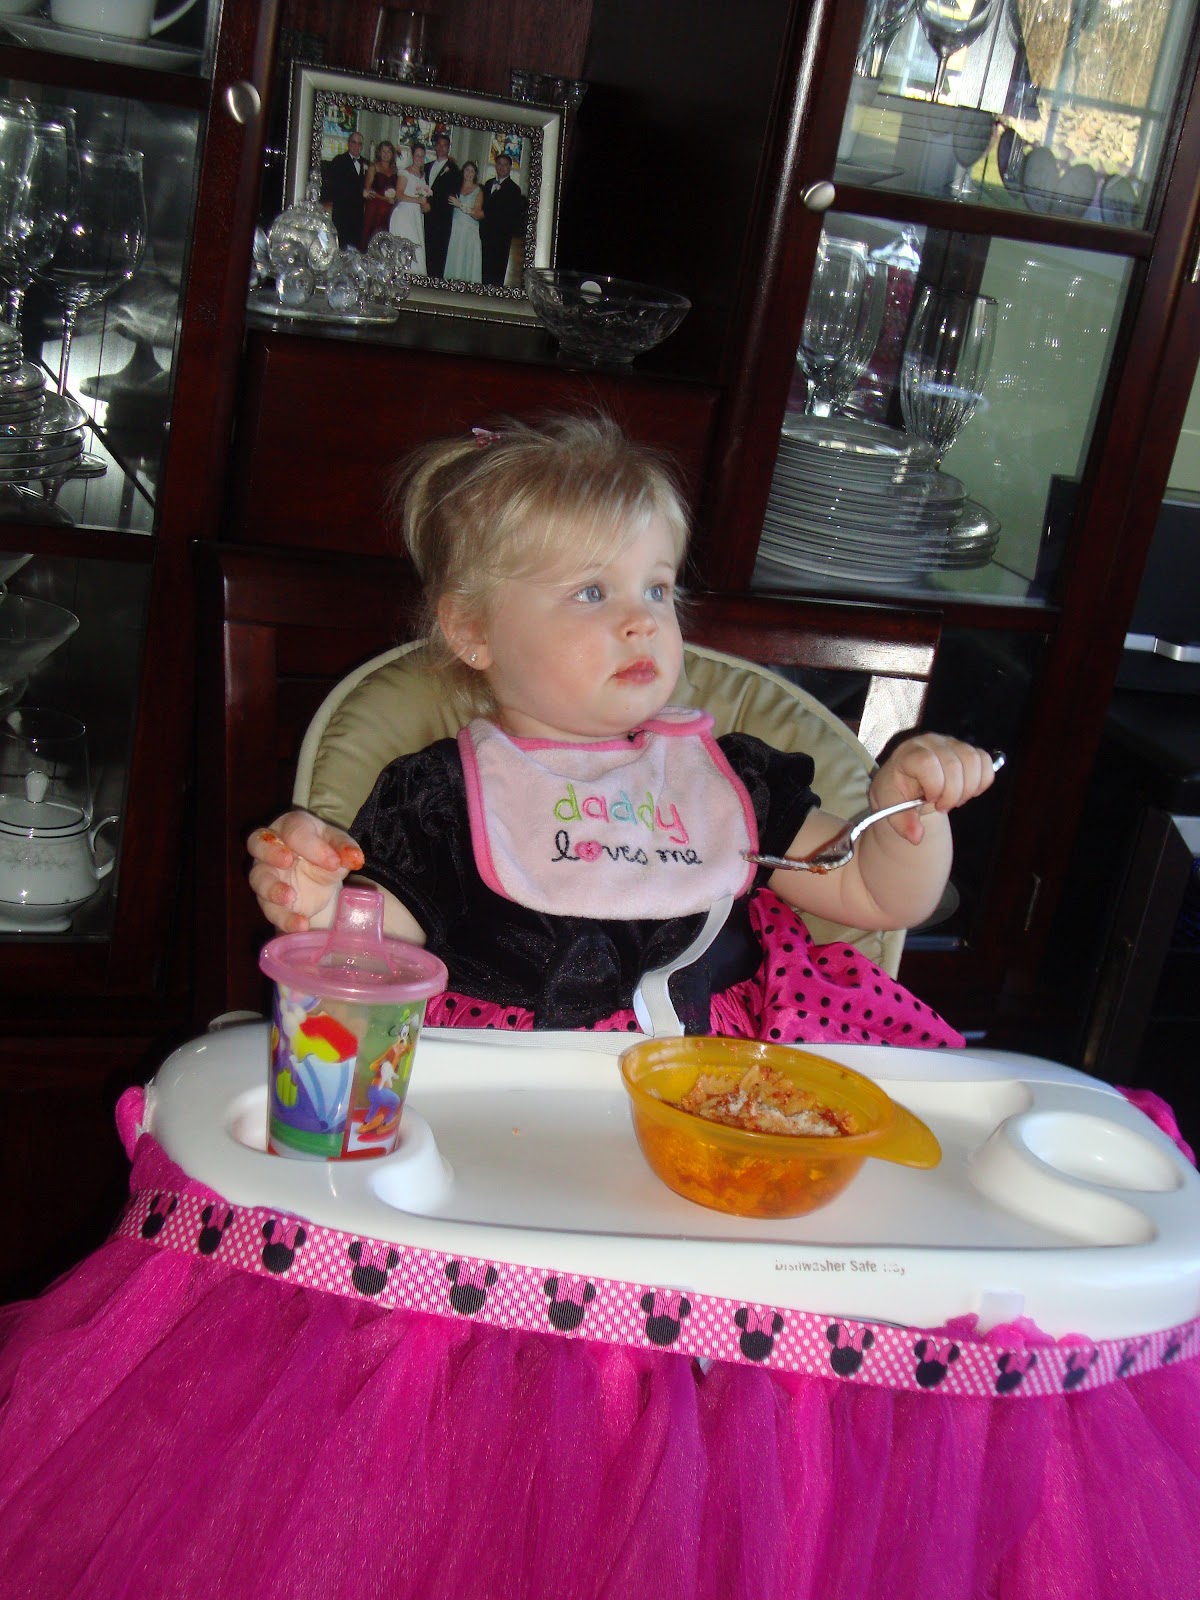
I made my first highchair tutu for Riley’s second birthday because, for her first birthday party, I forgot the highchair altogether. We have pictures of her eating cake out of my hand. It was a first-time mom mistake for sure.
For her second birthday party, I made up for it, though. I placed the ribbon around the outside of the tutu and it ended up dipping around the outside of the tray. I could have tried to hot glue the ribbon to the outside of the tutu, but I wanted Riley to be able to wear it as a tutu afterward. She totally does, too! Most people assume that the tutu will get covered in cake, but neither one of ours did. Most of the time, she wears it over her jeans! Love that girl!
First Birthday Party Tips For Success
- The first birthday party is more about amusing the other kids who are attending than about amusing your one-year-old.
- When creating the menu, keep your grownup guests in mind and just make a large dish of kid-friendly food like mac-n-cheese or chicken fingers.
- Collages with 12 pictures, with each picture representing a month of your child’s life with milestones like the first tooth, first time crawling, standing, or eating solid foods are great milestones to track.
- Get the guests involved by having them write a note to the first birthday girl or boy, to open on their eighteenth birthday. This is especially important for grandparents and great-grandparents who may not be there to celebrate that birthday.
- Think about creating a smash cake for your first birthday girl. It will make the other children attending less crazy about getting their slice of cake and much easier for first birthday party pictures. And don’t worry if anything gets on your high chair skirt DIY project.
- Have your highchair tutu attached to the outside of the tray so that all you need to do is pop the tray onto the highchair.
- Place the highchair in a spot with a visually pleasing or blank background so that the focus during the first birthday party pictures is on the birthday girl and not on the background!
- Since you already have the tulle and the ribbon, why not go all out and make a whole theme around it? I tend to think a princess theme would fit right in, but you could also create an entire fairy wonderland!
- To make it even more fun, have all the guests (adults included), dress up as part of the theme you have chosen. Don’t worry if you have any boys on your guest list—they can always become little kings or princes.
- Your little girl is probably not going to remember this first birthday party, so it is super important to capture as many moments as you can in pictures. Just think of the stories you will be able to tell her a few years from now!
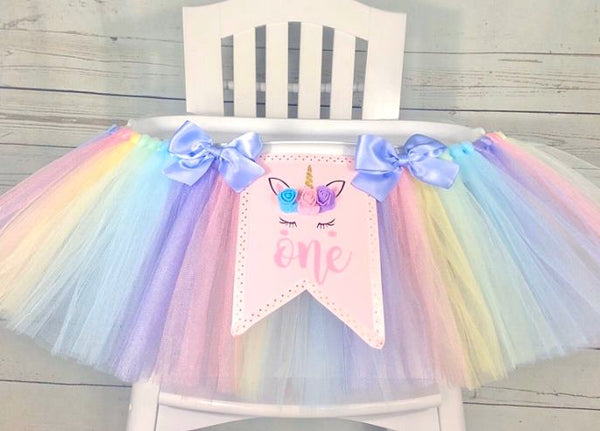
For Avery’s Fairy First Birthday party I decided not to go with a ribbon around the outside. Since the decor consisted of Tulle Pom Poms, it only seemed natural to leave the tulle exposed. I loved how well it matched the Fairy Magic Wands.
FAQs
Do I Need To Use A Certain Type Of Tulle?
Tulle can be made from both natural and synthetic fibers. But let’s be real: She will lose interest in the tutu before long, so there is no reason to buy the most expensive stuff you can find. Nylon tulle is found practically everywhere, and there is no high price tag to go with it.
What Are The Best Colors Of Tulle To Use?
The colors that you choose are completely up to you, but it is worth noting that lighter colors are easier to see through. You may need to use several more layers of tulle to get the coverage that you want. For example, white may need 10 layers to really make it pop, while something like red only needs two or three layers. The darker you go, the less material you will need.
Will The DIY High Chair Tutu Be Washable?
Yes, you will be able to wash the tutu if she gets it dirty. There are two ways you can do this: either by hand or in your washing machine.
You can only use the washing machine option if it has a setting like “delicate,” “wool,” or “hand wash,” and you can use a warm temperature setting. Follow the instructions for your particular machine, but keep in mind that tulle should never be washed in water over 30 degrees.
The easiest way to hand wash your tutu is by filling up a sink or bucket with warm water and a small amount of liquid detergent. If you use too much soap, you will spend forever trying to rinse the suds out of the tutu.
Gently swish it around in the water and let it soak for a couple of hours. Rinse it out under running water and gently squeeze out the excess. All you need to do next is hang it to dry and you are ready to use it again.
It’s now up to you to create the perfect first birthday party highchair tutu. The materials are easily found online or at your local craft store, and the instructions are easy to follow. Anyone can put this together, and I would love to see some pictures of what you manage to come up with!
Can I Make The Tutu For Other Chairs?
Yes, you absolutely can. This is such a versatile idea that you can adapt to your own scenario. Your daughter doesn’t even have to be the one who’s obsessed with tutus. I’m an adult and I still can’t get over how adorable this piece is.
I love the idea so much that I might even consider pulling off a Carrie Bradshaw and making myself one.
Just measure the chair or table you have and follow the instructions. That way, it can be great for any chair, any holiday, and any table you can think of.
Can I Repurpose The Tutu?
Once everyone’s had their fair share of fun with the tutu, it’s time to find the fabric a new role. Tulle is a very versatile material that you can repurpose easily.
Think of cute little tulle pom-poms for a themed party, for Halloween crafts, Christmas decorations and ornaments, as packing material for gifts, a tulle wreath, and so on. Finding a new purpose for fabrics will not only boost your creativity but will also reduce waste, which is always a great thing.
Conclusion
Now that you know how to make a tulle high chair skirt, it’s time to go online and start shopping. This little DIY project can be such a unique bonding experience for you and your little one. She can help you pick a color and decorate the tutu, and it will be her favorite thing to put on.
If you have an at-home birthday party coming up, or have extra time on your hands, this seems like an amazing idea and way to get creative. It won’t break the budget, either, it’s so simple to make, plus it takes only an hour and a half or so. The pictures that you’ll take of the tutu will inspire all your friends to take up a new DIY task themselves.


Please upload banner from store admin blog pages

